A simple digital tool to engage teachers and learners
By Marianne Jones
Getting teachers on board with using digital tools to enhance learning can be a challenge. Many are resistant, through fear of losing control of the class, not seeing the value, viewing it as extra work, etc.
This is fairly common to see. Teachers are users of technology in the lesson not the students. A teacher using technology needs to ask themselves some questions – does this add value to the lesson? Does it enhance the learning experience for students? Or does it simply make it easier to put everything in one place (such as using PowerPoint)? Is it student-focused learning? It is more than just substitution? If it is not, and the technology is not adding value, then do not use it. It can be more damaging to use it badly than not using it at all.
 A simple QR tool
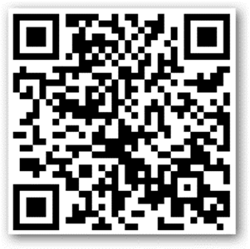
Something that I like to start with, when introducing teachers and students to digital tools and how they can be used, is QR codes. QR stands for Quick Response. You have probably seen them on advertisements or promotions. As you can see on the right, they are black code boxes that you can scan with your phone or tablet. They open a link to a website or page. In a lesson, you can have some fun with these. Students enjoy them and they are a safe low tech introduction for teachers.
In the classroom
Here are a couple of examples of using them in a language classroom.
Creating a reading task with QR codes
- Take a reading text that you like and break it down into smaller chunks (this is best done on the computer to make creating codes quicker).
- Visit the website www.qrstuff.com and click “plain text”.
- Copy a piece of the reading into the box and click “download QR code”. This piece of text is now in that code. Repeat for all parts of the text.
- In the text, find 6-8 lexical items that you want the students to learn (making sure the definitions can be easily taken from how the word is used or is explained).
- Create a table - word and definition. Leaving the definition space blank.
- Print copies of this worksheet. One for each group.
- Using the reading text, write 10 questions you want the students to answer about the text.
- Print them off and cut them up into individual questions.
Delivering it in a lesson
- (Put the QR codes up around the room)
- Start with a warmer connected to your reading topic, e.g. images on the board to elicit vocabulary.
- Put the students into pairs and give each group a vocabulary worksheet.
- Explain that they need to find the meanings to the words in the table. The answers are in the reading text.
- Demo. You scan a QR code using the app on the tablet and show the students that part of the reading passage shows up. Read it aloud and see if a definition is in it.
- Explain that the reading isn’t in order and each code is a different paragraph of the reading.
- Check your instructions and start the activity.
- When students are done, check their answers.
- Now explain that they have questions to answer. Give each group one question (I mix them up so they do not all start in the same place).
- It is a reading race. They have to scan the codes and find the answer. Write it down. Bring it to you to check. If it is right, give them the next question. (The main thing here for the teacher is to have different piles of questions and label a colour for that group. It is easy to get mixed up here. Be careful!)
- Demo this to the class. Check your instructions. Students start.
- Check all the answers.
- Extension To add to this, I ask the students to pick 5 of the questions and turn the question and answer into a statement. Students then peer check each other’s work.
The reasoning for using QR codes like this is to make the task even more personalised to the learners. It enables them to take the reading passage away and read independently of the class, in a small group so students help each other, at their own pace, and makes that task less daunting and accessible to everyone.
Adaption
Another way of using QR codes in a similar lesson flow is to replace the reading text with an audio file. This has to be linked through cloud storage but it works in the same way. The listening becomes personalised and each student can listen and repeat as many times as they need. Not working at another student’s pace.
The main things to remember here are having a good demo students can copy, checking your technology instructions and your task instructions. Without these, you will end up running around explaining it all again to each group. This is counterproductive to the task, technology use, and lesson as a whole!
So, give it a try in class and see if it enhances any of your lessons.
 |
Author's Bio: Marianne Jones is a Digital Education Trainer currently working for the Ministry of Education in the United Arab Emirates. Over the last 14 years she has taught ESL, trained teachers in ESL and digital education, and developed training courses. She is an advocate of technology to enhance learning with a focus on students as content creators. She has worked in Asia, Europe, and the Middle East and has a BSc(hons), CELTA, PGCE, and MA TESOL. |